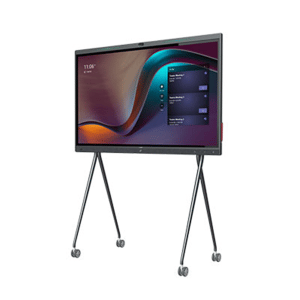
samsung TV

Commercial AV Procurement Guide for Smarter Buys

A conference room can look fully equipped on paper and still fail the first real meeting. The camera may not frame participants correctly, the display may lack the right inputs, or the room controller may not support the organization’s chosen meeting platform. A commercial AV procurement guide prevents these expensive gaps by treating each purchase as part of an operating environment, not as a collection of individual products.

For procurement teams, IT leaders, facilities managers, and education buyers, the objective is clear: buy the right equipment at a competitive commercial price, deploy it predictably, and keep it supportable over its useful life. That requires a sharper process than comparing unit prices across online listings.

Start the Commercial AV Procurement Guide With the Room

The best AV specification begins with how a space is used. A six-person huddle room, a 16-seat boardroom, a divisible training space, and a lecture hall may all require video conferencing, but they should not receive the same equipment package.

Document room dimensions, table layout, seating capacity, ceiling height, ambient light, acoustics, existing displays, network availability, power locations, and cable pathways. These details determine whether a standard USB conference camera is sufficient or whether the room needs a dedicated appliance, multi-camera tracking, ceiling microphones, audio processing, and control integration.

Platform choice matters just as much. If the business standard is Microsoft Teams Rooms or Zoom Rooms, procure certified room systems designed for that platform. A lower-cost device that requires a personal laptop for every meeting may suit a small flexible space. It is rarely the right answer for executive rooms or high-use shared spaces where users expect one-touch join functionality.

A practical room brief should answer three questions: who uses the room, what meetings take place there, and what must work without technical assistance? Those answers set the performance floor before brands, models, and prices enter the conversation.

Specify Outcomes, Not Just Product Categories

“Conference camera,” “commercial display,” and “speakerphone” are purchasing categories, not complete specifications. Procurement documentation should define the intended outcome and the conditions the equipment must meet.

For example, a camera requirement should cover field of view, optical zoom, framing behavior, low-light performance, mounting position, and compatibility with the selected compute platform. In a long boardroom, digital zoom can leave remote participants looking at soft, cropped images. Optical zoom and a PTZ camera may cost more upfront, but can materially improve the meeting experience.

Audio deserves the same scrutiny. A single tabletop speakerphone can work well in a small room with soft finishes and close seating. In a larger room with glass walls, hard surfaces, and participants sitting several feet from the table center, it can produce poor pickup, echo, and uneven voice levels. That room may need expansion microphones, a soundbar with beamforming microphones, or a professional microphone and DSP design.

For displays, specify usable viewing distance, content type, required brightness, operating hours, orientation, and source requirements. A consumer television may offer an attractive purchase price, but commercial displays are typically better suited to long daily operating hours, remote management, warranty expectations, and digital signage applications. The right choice depends on usage. A lightly used meeting room and a lobby screen operating all day should not be evaluated the same way.

Standardize Where It Delivers Real Value

Standardization is one of the strongest controls in commercial AV procurement. It reduces support complexity, accelerates deployment, simplifies training, and gives buyers more leverage when purchasing across multiple rooms or sites.

Create approved solution tiers rather than forcing every room into one design. For instance, an organization may standardize a small-room kit, medium-room kit, large-room kit, training-room kit, and executive-room kit. Each tier should include the approved camera, audio system, display size range, mounting hardware, cabling, compute device, and management approach.

The aim is not to eliminate flexibility. A heritage building, a university lecture theater, or a room with unusual acoustics may need a tailored design. The goal is to make exceptions visible and justified instead of allowing every site to select different hardware based on immediate availability or a one-off discount.

Standardized bundles also make quoting more accurate. When every package includes the accessories often missed in initial budgets – mounts, adapters, extension cables, touch controllers, power supplies, and installation hardware – teams avoid the late-stage costs that undermine a supposedly low quote.

Evaluate Total Cost, Not the Lowest Cart Price

The lowest line-item price is not always the lowest commercial cost. A procurement decision should consider acquisition, deployment, operations, and replacement.

Start with the direct costs: equipment, freight, taxes, mounts, cables, licensing, and warranty coverage. Then account for labor, configuration, room commissioning, user training, and the likely cost of resolving compatibility issues. A system that arrives as a validated room solution can be better value than separately sourced components that require extra troubleshooting before they work together.

Lifecycle matters too. Ask whether the product has centralized management, firmware support, replacement stock availability, and a clear commercial warranty. A display or room system purchased near end of life may look like a bargain, but it can create standardization problems when expansion rooms need matching products six months later.

For larger deployments, finance options can also change the purchasing decision. Spreading expenditure may allow an organization to standardize more rooms sooner rather than delaying critical upgrades. That only makes sense when the monthly commitment, term, and total cost align with the organization’s budget policy.

Validate Compatibility Before Issuing a Purchase Order

Compatibility should be checked at the solution level, not assumed from marketing language. “Works with Teams” may mean the device can be used through USB, while “Teams Rooms certified” means it is built and validated for a dedicated room deployment. Those are different buying decisions.

Before approval, confirm the relationships between the meeting platform, room compute, camera, audio peripherals, touch controller, display, network, and device management tools. Confirm whether the selected hardware supports the organization’s operating system, authentication method, security policy, and network configuration.

This is especially relevant for USB-based rooms. USB cable length limits, bandwidth requirements, and power delivery can affect whether a camera or audio device performs reliably from its planned location. A room may require active extension hardware or a different architecture entirely.

Use a pre-purchase validation checklist for high-value rooms and multi-site rollouts:

  • Platform certification and supported software versions
  • Camera, microphone, speaker, display, and controller interoperability
  • Network, power, mounting, and cable requirements
  • Management, security, warranty, and firmware-update responsibilities
  • Accessibility requirements, including captioning and hearing assistance where applicable

A supplier with technical AV expertise should be able to identify gaps in the proposed bill of materials before products ship. That review is often faster and less costly than rectifying a room after furniture, displays, and cabling are already installed.

Buy for Deployment, Not Delivery Alone

Fast delivery matters, particularly when projects are tied to office moves, term dates, or refresh deadlines. But delivery is only one milestone. Commercial buyers should establish who receives equipment, stores it securely, labels assets, stages devices, installs mounts, configures rooms, tests performance, and signs off the completed space.

For a single room, an internal IT team may handle the work. For a multi-room or multi-site rollout, installation and integration support can protect schedules and produce a more consistent outcome. This is particularly valuable when display mounting, structured cabling, audio tuning, control programming, or after-hours work is required.

Request quotes that separate hardware, services, and optional items clearly. That allows procurement to compare proposals fairly and decide where internal teams can take responsibility. It also prevents a common problem: approving hardware first, then discovering that installation requirements exceed the remaining project budget.

Protect the Investment After Go-Live

AV systems are operational technology. They need ownership after installation. Assign responsibility for device monitoring, meeting-platform updates, firmware maintenance, cleaning, replacement accessories, and first-line user support.

Build a simple asset record for every room, including model numbers, serial numbers, purchase dates, warranty status, network details, configuration notes, and support contacts. This makes refresh planning far easier and reduces downtime when a component needs replacement.

Procurement should also plan for spares. Keeping a small number of approved cables, remote controls, power supplies, and critical USB peripherals can restore a room quickly. For larger standardized estates, holding a spare room system or display may be justified where meeting availability is business-critical.

The right commercial AV purchase is the one users can walk into, operate immediately, and rely on repeatedly. Define the room outcome, validate the system, price the full lifecycle, and choose supply and support partners that can stand behind the deployment. That is how AV procurement becomes a controlled business decision rather than a recurring source of urgent fixes.

AV Control Systems for Smarter Commercial Spaces

A boardroom should not need a laminated instruction sheet, three remotes, and a call to IT before a client presentation. AV control systems replace that friction with one predictable way to start a meeting, select a source, adjust the room, and shut everything down when the session ends.

For commercial organizations, that simplicity is not a cosmetic upgrade. It protects meeting time, reduces support tickets, encourages adoption of installed technology, and gives IT teams a more manageable standard across rooms and sites. The right system can bring displays, projectors, conferencing hardware, audio processors, lighting, blinds, and occupancy devices into a single user experience.

What AV Control Systems Actually Do

An AV control system is the command layer for a room’s technology. It tells equipment what to do and presents users with the controls they need through a touchscreen, wall keypad, scheduling panel, mobile interface, or computer-based dashboard.

A typical meeting room workflow might begin with a user tapping “Start Meeting.” The system powers on the display, wakes the video bar or conference camera, sets the correct input, adjusts the audio level, and can lower shades or set the room lighting. At the end of the meeting, one command can turn equipment off and return the space to its default state.

The distinction matters: a control system does not necessarily carry video or audio itself. Switching, distribution, DSP, conferencing appliances, and displays each handle their own jobs. The controller coordinates them. In a smaller huddle room, that coordination may be built into an all-in-one device or display. In a divisible training room, it may involve purpose-built processors, touch panels, network interfaces, and carefully programmed logic.

Why Commercial Spaces Need Centralized Control

Most room technology problems are not caused by a lack of devices. They happen because the devices were added at different times, configured independently, and left for users to figure out. A premium display, excellent conference camera, and capable wireless presentation system still create a poor experience if people must guess which remote changes the volume.

Centralized control makes the room easier to operate, but it also creates operational discipline. Facilities teams can standardize shutdown behavior to reduce unnecessary power use. IT can restrict advanced settings that users should not change. Support staff can identify whether a display is offline, a source is disconnected, or a room has been left powered on, depending on the platform and network design.

This is especially valuable where rooms need to work the same way. Corporate offices with repeated room types, university teaching spaces, medical training rooms, council chambers, and multi-site organizations all benefit from a familiar interface. Users should be able to walk into another room and know how to join a video call or share content without a fresh learning curve.

The Business Case Is Usually Time, Not Features

A control system earns its place when it removes recurring waste. If five people lose six minutes at the beginning of a weekly meeting because the room will not start correctly, the cost compounds quickly. Add executive rooms, customer-facing spaces, classrooms, and shared training areas, and the impact becomes material.

That does not mean every room needs a sophisticated custom controller. A two-person focus room with a USB conference camera and a single display may be better served by a simple, reliable setup. The goal is appropriate control, not maximum complexity.

Choose the Control Approach for the Room Type

The starting point is not the touchscreen. It is the room workflow. Define what people need to do in the space, how often they do it, and which actions must happen consistently.

A basic meeting room may need only display power, source selection, volume, and video conferencing control. A boardroom may require multiple presentation sources, dual displays, a conferencing appliance, ceiling microphones, amplified speakers, cameras, room scheduling, and support for guest devices. A training room may add lecture capture, confidence monitors, assisted listening, and partition control when rooms combine.

Native Room Controls

Many Microsoft Teams Rooms, Zoom Rooms, commercial displays, and all-in-one video bars include their own controllers or touch interfaces. This is often the fastest and most cost-effective option for standardized rooms with straightforward requirements.

Native controls are a strong choice when conferencing is the center of the room experience and the equipment list is limited. The trade-off is flexibility. If the room later adds third-party AV switching, motorized shades, complex audio, or multiple operating modes, native controls may not provide the depth required.

Dedicated AV Control Platforms

Dedicated platforms are designed to coordinate multiple technologies and create a tailored user interface. They are commonly specified for executive boardrooms, large conference rooms, lecture theaters, training facilities, and divisible spaces.

Their advantages are broad device compatibility, custom logic, scheduling integration, remote monitoring options, and a consistent user experience across complex rooms. The trade-off is that design and programming require experienced integration work. A poor control interface can make expensive equipment harder to use, so the programming scope should never be treated as an afterthought.

Hybrid Control Designs

Hybrid systems are increasingly common. A Teams or Zoom touch console may remain the primary interface for calls, while a dedicated AV touchscreen handles room modes, lighting, advanced camera presets, source routing, or divisible-room functions.

This approach can be effective, but only when responsibilities are clear. If users must use one panel to join a call and another to select a camera without obvious guidance, the design has failed. Good hybrid rooms hide complexity rather than moving it between screens.

Key Design Decisions Before You Buy

Procurement should begin with a room brief, not a list of product part numbers. The most successful deployments identify the practical requirements early: room capacity, furniture layout, display locations, video platform, presentation sources, accessibility needs, network rules, and support model.

There are four decisions that deserve particular attention:

  • User workflows: Document the most common tasks first, such as starting a Teams meeting, sharing from a laptop, switching to a guest presentation, or running a training session. The interface should make these actions obvious within one or two taps.
  • Control connections: Devices may be controlled over IP, serial, USB, infrared, relay, or digital I/O. IP control is flexible and increasingly common, but it depends on sound network planning, security policies, addressing, and device management.
  • Failure behavior: Consider what happens when the network drops, a display is replaced, or a conferencing appliance restarts. Critical functions should recover predictably, and support teams need a clear way to diagnose faults.
  • Future expansion: Allow for additional sources, cameras, room sensors, or displays where growth is likely. This does not mean buying unused capacity everywhere. It means avoiding an installation that can only be changed through major rework.

Don’t Underestimate Audio and Network Dependencies

Control is only as dependable as the systems it manages. In larger rooms, audio is often the limiting factor. Ceiling microphones, beamforming arrays, digital signal processors, USB bridges, amplifiers, and speakers need to be designed as a complete signal path. A touchscreen cannot solve echo, poor gain structure, or a microphone placed too far from participants.

The same applies to networking. Managed AV devices need appropriate VLAN design, secure credentials, firewall rules, PoE capacity, and stable addressing. IT teams should be involved early, particularly where conferencing systems, digital signage, wireless presentation, building management systems, or remote management services share the network.

A practical specification also identifies ownership. Facilities may manage lighting and shades, IT may manage networked devices and collaboration platforms, while an AV integrator supports programming and hardware. Without agreement on who handles which issue, remote monitoring can generate alerts without anyone accountable for resolving them.

Make the Interface Simple Enough for Guests

The best control interface is rarely the one with the most pages. A visitor should be able to enter the room, understand how to begin, and present content without training. Advanced functions can be available, but they should not dominate the opening screen.

Use plain labels. “Present Laptop” is clearer than “HDMI Input 2.” “Camera Presets” is more useful than “PTZ Control.” Confirm potentially disruptive actions, such as ending a session or shutting down a room, but do not add confirmation screens to routine tasks. Small delays and unclear labels are exactly what cause users to reach for a help desk number.

Consistency also matters more than visual novelty. If every room uses the same names, icons, and button positions, staff build confidence quickly. That is a significant advantage for organizations standardizing technology across offices, campuses, or customer briefing centers.

Procurement, Installation, and Ongoing Support

AV control systems should be procured as a solution, not as a disconnected collection of controllers, panels, and cables. Compatibility needs to be confirmed across the conferencing platform, displays, cameras, audio hardware, switching, and network environment. Installation quality matters just as much as the equipment selection, particularly for racks, cabling, audio tuning, device labeling, and commissioning.

Before handover, test the real scenarios people will use. Join a scheduled video meeting, share from managed and guest laptops, move between sources, test camera framing, verify audio from every seating position, and confirm the room recovers correctly after a power cycle. Ask support staff to run the test as well. If they cannot understand the system, users will struggle too.

e365 SuperStore can help commercial buyers source compatible conferencing, display, audio, networking, and control hardware with the technical guidance needed to turn a room specification into a deployable solution. For larger or more specialized spaces, engage installation and integration support early rather than trying to solve design gaps after equipment arrives.

The right result is a room that feels almost invisible: people walk in, start work, and focus on the conversation instead of the technology.

Interactive Display vs Projector for Workspaces

A room can have an excellent video bar, clear audio, and a reliable conferencing platform, then still fail the moment someone tries to share a spreadsheet, annotate a design, or read content from the back row. The interactive display vs projector decision affects far more than the image on the wall. It shapes meeting behavior, room support requirements, capital planning, and how confidently people use the space.

For business buyers, schools, and facilities teams, there is no automatic winner. Interactive displays usually deliver a more consistent collaboration experience with lower day-to-day support demands. Projectors can still be the right commercial choice where image size, room architecture, or budget priorities lead the brief. The right answer comes from matching the technology to the room, not choosing the product category with the most impressive specification sheet.

Interactive Display vs Projector: The Core Difference

An interactive display is a large-format commercial screen, typically 55 to 86 inches or more, with touch capability built into the panel. Users can write, mark up documents, control applications, and often connect laptops or room systems through wired or wireless sharing. It provides a bright, fixed image without casting light across the room.

A projector creates an image on a screen or wall from a ceiling, wall, or tabletop-mounted unit. Standard projectors are display-only, while interactive projector setups add cameras, pens, or touch modules to enable annotation. Projection remains highly flexible because it can produce images well beyond the size of most flat panels.

That distinction matters in practical terms. A display is generally a self-contained collaboration endpoint. A projector is often one component in a broader AV system that includes a screen, mounts, control hardware, cabling, speakers, and possibly interactive accessories.

When an Interactive Display Is the Better Investment

Interactive displays are a strong fit for meeting rooms, huddle spaces, training rooms, and classrooms where people need to actively work with shared content. In a design review, for example, a team can mark up drawings directly on screen. During a hybrid meeting, an onsite participant can annotate a whiteboard while remote attendees see the changes through the room camera.

Brightness is one of the clearest advantages. Commercial displays are designed to remain visible in well-lit spaces, including open-plan offices and rooms with windows. There is no presenter shadow, no beam crossing the table, and no need to darken blinds before a session. That removes a common friction point in rooms that host back-to-back meetings.

Touch is also more natural on a display. Modern panels support multiple simultaneous touch points, palm rejection, digital whiteboarding, and annotation across common collaboration platforms. For teams standardized on Microsoft Teams Rooms, Zoom Rooms, or BYOD meeting workflows, a touch display can simplify the user experience by keeping content interaction in one place.

Reliability is another commercial advantage. There are no projector lamps to replace and no projection surface that can become visibly marked or damaged over time. A quality commercial display has a predictable operating profile, especially when paired with professional installation, cable management, and a support plan.

The trade-off is size and upfront cost. An 86-inch interactive display is substantial, but it may not be large enough for a deep lecture hall, large boardroom, or all-hands space. Buyers also need to allow for wall loading, mounting, power, network access, and the right sightlines. Installing a panel too high or choosing a screen too small will undermine the investment just as quickly as choosing the wrong technology category.

Best-fit rooms for interactive displays

Interactive displays work particularly well in small to medium meeting rooms, collaboration zones, executive briefing rooms, training spaces, and standard classrooms. They are especially valuable where users rotate frequently and cannot be expected to troubleshoot input sources, lamps, focus, or room lighting before every session.

For organizations building standardized rooms across multiple sites, displays can also make support easier. A repeatable screen size, mounting position, conferencing system, and connection method reduces variation for IT teams and gives staff a familiar experience wherever they work.

When a Projector Still Makes More Sense

Projectors remain highly capable commercial AV tools. Their greatest advantage is scalable image size. A projector can deliver a 100-, 120-, or 150-inch image without the cost and physical weight of an equivalent direct-view display. In large classrooms, lecture theaters, auditoriums, houses of worship, and presentation venues, that can be decisive.

They are also useful where architecture does not accommodate a large wall-mounted panel. Some rooms require a retractable screen because the wall is used for other purposes. Others need the screen to sit above furniture, heritage finishes, or existing room features. A ceiling-mounted laser projector with a motorized screen can preserve the room layout while still providing a professional presentation surface.

Modern laser projectors have improved the case for projection. They offer long light-source life, fast startup, strong color performance, and significantly less maintenance than older lamp-based models. Short-throw and ultra-short-throw models can reduce shadows and make smaller spaces more workable, although placement and screen quality still matter.

The limitations are environmental. Ambient light reduces perceived contrast and can wash out fine text, especially on a whiteboard, spreadsheet, or detailed dashboard. Projectors also require careful alignment, focus, and surface selection. A bright room with uncontrolled daylight may need blackout treatments, a high-gain screen, or a higher-output projector, all of which affect the total project cost.

Best-fit rooms for projectors

Projection is often the right answer for large-format viewing, especially when most content is presented rather than annotated. It suits lecture rooms, large training facilities, divisible spaces, auditoriums, and boardrooms where viewers sit far from the screen.

A projector can also be effective in classrooms, provided the room lighting is manageable and the selected model matches the throw distance. The lowest-priced projector is rarely the best value if it produces a dim image, requires frequent servicing, or cannot display readable text at the required size.

Compare Total Cost, Not Just Purchase Price

The purchase price is only one part of the interactive display vs projector calculation. A display may cost more than an entry-level projector, but the installed system may be simpler. In many rooms, it needs a commercial mount, power, network connection, and appropriate input or conferencing hardware.

A projector project can involve more variables: projector mount, screen, ceiling cabling, control system integration, audio reinforcement, electrical work, and ongoing maintenance. None of these make projection a poor choice. They simply need to be included in the quote from the beginning.

Lifecycle planning is equally important. Lamp projectors require replacement lamps and may lose brightness over time. Laser projectors reduce that burden, but filters, alignment, screen condition, and usage hours still deserve attention. Interactive displays avoid lamp replacements, though commercial-grade models should be selected for the intended daily operating hours and warranty requirements.

For a fleet rollout, calculate the cost of a room being unavailable as well. If an IT team must repeatedly resolve source switching, image alignment, or worn accessories, the labor cost can exceed a modest difference in hardware price. Standardization, documented room design, and certified installation protect the value of either approach.

Choose by Use Case, Viewing Distance, and Light

Start with what people must do in the room. If they need to write, annotate, workshop, and control content at the screen, prioritize an interactive display. If the primary need is to show content to a large audience, evaluate projection first.

Then assess viewing distance. A panel that looks impressive in a showroom can be too small at the far end of a long room. Conversely, a huge projected image may be unnecessary in a compact huddle room where participants sit only a few feet away. Fine text, spreadsheets, and video conference participant tiles require more careful sizing than presentation slides.

Finally, inspect the room itself. Measure wall space, ceiling height, furniture placement, windows, lighting control, power, network pathways, and camera position. The display or projector must work with the room camera and microphone system, not obstruct them. A screen placed behind a presenter may look good in a floor plan but create poor sightlines for remote participants.

Build a Room That People Will Actually Use

The best visual technology is the one employees, students, and guests can operate without calling support. For many meeting rooms and teaching spaces, that points to a commercial interactive display with a familiar touch interface and integrated collaboration workflow. For larger venues, a properly specified laser projector and screen can provide the scale that flat panels cannot match economically.

Before purchasing, define the user workflow, confirm the physical constraints, and specify the complete system rather than the screen alone. e365 SuperStore can help commercial buyers compare professional display, projector, conferencing, mounting, and installation options so the finished room performs as confidently as the technology promised.

Touchscreen vs Smartboard: Which Fits Your Space?

A meeting room display fails when people stop using it. The screen may be large, bright, and expensive, but if staff cannot join a call, mark up a document, or share a laptop without waiting for help, it becomes wall décor. That is why the touchscreen vs smartboard decision is less about buying a bigger display and more about choosing a collaboration workflow your people will actually adopt.

For IT teams, procurement leaders, and education buyers, the labels can create unnecessary confusion. A Smart Board is commonly used to describe an interactive whiteboard, particularly products associated with the SMART brand. A touchscreen may refer to a commercial interactive flat panel display from many manufacturers. They can overlap significantly, but they are not automatically interchangeable.

Touchscreen vs Smartboard: the practical difference

A touchscreen is a display with a touch-sensitive surface. In commercial environments, it is usually an interactive flat panel that combines a 4K screen, multi-touch input, speakers, connectivity, and often an embedded operating system. It can run whiteboarding software, display presentations, accept HDMI or USB-C input, and support video meetings through a connected room system or PC.

A Smart Board traditionally describes an interactive whiteboard ecosystem. Earlier Smart Board installations often used a projector, a whiteboard surface, and a connected computer. Modern SMART interactive displays are flat panels, so the physical difference is often much smaller than buyers expect. The distinction frequently comes down to the software experience, teaching or collaboration tools, device management, and the way users interact with content.

Put simply: many modern Smart Boards are touchscreens, but not every touchscreen is a Smart Board. If your brief says “we need a smartboard,” clarify whether stakeholders mean a SMART-branded solution, any interactive display, or a complete collaboration setup including conferencing, whiteboarding, installation, and support.

Start with the room, not the product name

The right choice depends on how the room is used between meetings, not just during a product demonstration. A 65-inch interactive panel may be excellent in a small huddle room, while a training room with 20 participants may need a 75-inch or 86-inch model for legibility from the back row. Screen size, viewing distance, ambient light, seating layout, and wall position all affect the result.

Touch response matters as well. A basic presentation display may support one or two touch points, while an interactive panel designed for workshops or classrooms can recognize multiple simultaneous users. If two people regularly stand at the screen to sketch workflows, annotate plans, or solve problems, choose a panel with low writing latency and reliable palm rejection. Those details determine whether digital ink feels natural or frustrating.

For meeting rooms, consider the complete signal path. Will users bring their own laptop? Do they need USB-C charging and single-cable connectivity? Is there a Microsoft Teams Rooms or Zoom Rooms system in the space? Will the camera frame people at the display, and can the room PC recognize the panel as both a monitor and a touch device? A display purchase that ignores these questions can create expensive integration work later.

When an interactive touchscreen is the stronger buy

An interactive touchscreen is often the best fit for organizations that want a flexible, modern room standard without tying every space to one proprietary collaboration platform. These displays can work as a front-of-room presentation screen, a digital whiteboard, an annotation surface, and a companion display for a video conference.

They are particularly effective in executive boardrooms, project rooms, sales spaces, and hybrid training environments where content sharing is the main priority. A quality commercial panel delivers consistent brightness, sharp text, and reliable operation without the lamp changes, shadows, and alignment issues associated with older projector-based whiteboards.

The commercial advantage is standardization. IT can select an approved panel size and connectivity profile, then pair it with the same video bar, room controller, wireless presentation system, or mini PC across multiple locations. That simplifies deployment, user training, remote management, and replacement planning.

There are trade-offs. Not every touchscreen has equally capable whiteboarding software, and some embedded operating systems are more useful than others. A panel may look competitive on a specification sheet but provide limited app support, weak device management, or a poor writing experience. Buyers should assess the whole platform, including warranty terms, firmware support, mounting options, and integration with existing meeting room technology.

What to specify for business use

Commercial buyers should look beyond resolution. Confirm the display’s brightness for the room’s lighting conditions, anti-glare treatment, touch-point count, USB-C power delivery, OPS or compute-module compatibility where required, and the available control connections for AV integration. Also verify that the panel is designed for the expected operating hours. A reception or command-center application has different durability requirements than a meeting room used several times daily.

For hybrid collaboration, test the user journey end to end. Connect a laptop, launch a video call, share content, annotate it, save the notes, and hand the room to the next user. If that sequence requires several adapters, remote controls, or support tickets, the design needs refinement.

When a Smart Board ecosystem makes more sense

A Smart Board solution is a strong choice when the organization values the specific software, lesson delivery tools, or whiteboarding processes built around that ecosystem. This is especially common in education, training centers, and structured workshop environments where facilitators need reusable templates, collaborative activities, digital ink capture, and tools that work consistently across rooms.

The value is not only the display. It is the familiar operating model. Teachers and trainers who already use a particular whiteboarding platform can prepare materials in advance, open them quickly, and continue sessions without rebuilding their process around a new interface. In these environments, a lower upfront hardware price can be a false economy if the new platform causes retraining, reduces participation, or breaks existing content libraries.

That said, software preference should not override technical fit. Check whether the chosen platform supports your identity system, guest access policy, device management approach, and conferencing environment. A classroom may prioritize interactive lesson tools, while a corporate learning room may need stronger support for Teams, Zoom, wireless sharing, and external cameras. The best answer can be a SMART-branded interactive display in one space and a different commercial touchscreen standard in another.

Budget for the installed solution

Comparing display prices alone is one of the most common procurement mistakes. The installed solution may also require a wall mount or mobile cart, cabling, a room PC or compute module, audio equipment, a camera, cable management, network configuration, and commissioning. Large panels can also require site assessment for wall structure, access routes, and safe handling.

A low-cost display can become the expensive option if it lacks the inputs, processing power, or service coverage needed for the room. Conversely, a premium interactive system may be unnecessary for a conference room where people only need to view presentations and join calls. In that case, a non-touch commercial display paired with a reliable video bar may deliver a cleaner experience and a better return on investment.

For multi-site rollouts, standardization usually creates the greatest long-term value. Establish approved room types, document the required accessories, and maintain a small number of display sizes and configurations. This reduces spare stock complexity and gives support teams a repeatable troubleshooting process.

A decision framework your team can use

Choose an interactive touchscreen when you need broad platform flexibility, high-quality presentation capability, and a configurable foundation for meeting rooms or shared workspaces. Choose a Smart Board ecosystem when established whiteboarding workflows, curriculum tools, or facilitator familiarity are central to the outcome.

If your users mainly consume content, do not assume touch is required. If they regularly create content together at the screen, do not compromise on touch accuracy, writing responsiveness, and collaboration software. And if the display will support hybrid meetings, treat cameras, microphones, room controls, and connectivity as part of the same purchase decision.

Before placing an order, involve the people who will run the room: IT, facilities, presenters, trainers, and end users. A short hands-on demonstration with real laptops and real meeting platforms will reveal more than a long specification comparison. e365 SuperStore can help buyers align interactive displays, conferencing hardware, installation, and technical support into a solution that is ready for the room, not just ready to ship.

The strongest display choice is the one that disappears into the work. When people can walk in, connect, collaborate, and leave with their ideas captured, the technology has done its job.

Lecture Capture That Works Beyond the Classroom

A missed class should not become a missed opportunity to learn. Done properly, lecture capture gives students a reliable way to revisit complex material, supports flexible attendance, and creates a usable record of teaching that extends well beyond a single timetable slot. Done poorly, it produces dark video, distant voices, unreadable slides, and a support burden that faculty and IT teams quickly learn to avoid.

For education leaders, the goal is not simply to put a camera in every room. It is to create a repeatable teaching experience that works for instructors, on-campus students, remote learners, and the people responsible for supporting the technology.

What Lecture Capture Should Deliver

Lecture capture is the planned recording of teaching sessions, usually combining the instructor, presentation content, and classroom audio into a recording that can be viewed later. It can be as simple as recording a presenter and slides, or as advanced as a multi-camera setup with automated tracking, live streaming, searchable transcripts, and learning management system integration.

The strongest systems remove friction at both ends. An instructor should be able to walk into a room, start a scheduled session with minimal effort, and teach naturally. Students should be able to find the recording quickly, hear every key point, and see both the presenter and instructional material clearly on a laptop or mobile device.

That standard matters because recordings are now used for more than absence coverage. Students use them to revise before exams, replay technical explanations, catch up after placement or work commitments, and study at their own pace. Faculty use them to refine delivery. Institutions use them to broaden access for learners who cannot always be physically present.

Start With the Teaching Space, Not the Camera

A lecture theater, a standard classroom, a simulation lab, and a hybrid training room have different capture requirements. Procurement decisions should begin with how the space is used, who is teaching in it, and what students need to see and hear.

In a traditional lecture theater, a high-quality PTZ camera with optical zoom can frame the presenter from the rear or side of the room without placing equipment in the teaching area. PTZ models are particularly useful when the instructor moves between a podium, whiteboard, and demonstration zone. Presets can recall those positions automatically, reducing the need for manual camera operation.

Smaller classrooms may need a wider view, especially where discussion-based teaching is common. A fixed camera can be cost-effective and dependable when the teaching position rarely changes. However, a very wide shot often makes the presenter too small to be useful. The lower initial price can create a poorer student experience if the camera cannot produce a clear, natural frame.

Specialist spaces require more planning. In a science lab, students may need a close view of a bench demonstration. In an art, design, or engineering studio, a document camera or overhead camera can be more valuable than a second room camera. In skills training, capturing the instructor’s hands or a close-up procedure may be essential. The right system follows the pedagogy, not a generic room template.

Camera Selection: Resolution Is Only One Factor

4K cameras provide useful flexibility for cropping and future planning, but resolution alone does not guarantee a good recording. Optical zoom, low-light performance, framing speed, mounting position, and control integration all affect the result.

Auto-tracking cameras can be a strong fit for active presenters, but they should be tested in the actual room. Tracking performance can be affected by stage layout, reflective surfaces, audience movement, and multiple people at the front of the room. For lectures with guest speakers, panel sessions, or live demonstrations, PTZ presets may deliver more predictable results than continuous tracking.

Camera placement also needs to respect sightlines and privacy. Mounting a camera too low may create obstruction and tampering risks. Mounting it too high can create an unflattering angle or make a whiteboard difficult to read. A professional site assessment prevents expensive rework after installation.

Audio Is the Decision That Determines Usability

Students may tolerate an average picture. They will not tolerate an unclear voice for an hour. Audio should be treated as the first design priority in any lecture capture deployment.

A lavalier or headset microphone generally provides the most consistent instructor audio, particularly in larger rooms or acoustically challenging spaces. A podium microphone can work for presenters who remain in one position, but it is less suitable for active teaching. Ceiling microphone arrays can capture a wider area and reduce the need for wearable equipment, though room acoustics, HVAC noise, and talker position must be considered carefully.

For lecture capture, it is also vital to capture program audio. That includes video clips, remote guest speakers, and computer-based demonstrations played through the room system. If this audio is missing from the recording, students may see a slide or video without hearing the explanation that makes it useful.

Digital signal processing helps manage echo, background noise, and level consistency. It is not a substitute for correct microphone selection or acoustic treatment. A reverberant room with poor microphone placement will remain difficult to listen to, regardless of the processing applied afterward.

Capture the Content Students Actually Need

A good recording usually combines at least two sources: the presenter camera and the content feed from the teaching computer. Capturing presentation slides directly is far better than aiming a camera at a projection screen. Text remains readable, colors stay accurate, and students can follow spreadsheets, software demonstrations, and detailed diagrams.

The capture workflow should account for every common teaching source. This may include HDMI or USB-C input from a faculty laptop, a room PC, document camera, digital whiteboard, and remote participants joining through Teams or Zoom. The system does not need to record every source all the time, but instructors need clear, consistent options.

Layouts should also be intentional. A side-by-side view of presenter and slides works well for many lectures. A picture-in-picture layout may suit software instruction. Full-screen content can make sense when the presentation itself is the focus. The key is ensuring that the layout can be selected without forcing instructors to become AV operators.

Automation Reduces Support Tickets

The most scalable lecture capture systems are scheduled and automated. When a class is listed in the academic timetable, the recording can start and stop automatically, use the correct room inputs, and publish to the approved destination after processing. Faculty retain the option to pause or stop a session where required, but they are not dependent on remembering a complex startup sequence.

Room control is equally important. A simple touch panel with clear labels such as Start Class, Record, Share Content, and Get Help is more reliable than an interface full of technical settings. If a user needs training just to begin recording, adoption will fall.

Automation should not remove governance. Institutions need policies for retention periods, editing rights, student consent, accessibility requirements, and access controls. A recorded class may contain student questions, sensitive discussions, or third-party content. The capture platform and institutional policy must work together.

Accessibility Is a Core Requirement, Not an Add-On

Captions and searchable transcripts make recorded teaching easier to use for everyone, not only students with documented accessibility needs. A student revising a complex topic can search for a term rather than scrub through 90 minutes of video. Captions also help viewers in noisy environments, learners studying in a second language, and anyone who benefits from seeing technical terminology spelled out.

Automatic captions are a valuable starting point, but accuracy should be assessed for discipline-specific language, names, acronyms, and technical vocabulary. Courses in medicine, law, engineering, and sciences may require a review workflow to reach the standard students need.

Accessibility also includes visual design. Slides with small text, faint color contrast, and dense tables are difficult to read in a recording even when captured directly. Faculty guidance and presentation templates can improve outcomes without adding complexity to the room system.

Standardize the Core, Allow for Exceptions

Multi-campus institutions gain significant operational value by standardizing room designs. Consistent cameras, microphones, control interfaces, and support processes make it easier to train staff, stock spares, manage warranties, and deploy upgrades. Students also benefit when every room produces recordings with a familiar experience.

Standardization should not mean forcing identical equipment into every space. A practical approach is to define a small number of validated room types: standard classroom, large lecture theater, flexible hybrid room, and specialist teaching space. Each design can use approved components and known workflows while still matching the function of the room.

This is where an experienced AV supplier and integration partner adds value. e365 SuperStore can help education teams source compatible cameras, audio systems, displays, room control, and collaboration equipment while supporting deployment planning across a wider estate. The objective is not a collection of impressive product specifications. It is a system that faculty will use confidently from day one.

Measure Success After Installation

A lecture capture project is not complete when the first recording is published. Review usage data, support requests, recording failures, caption quality, and faculty feedback during the first term. Look for patterns: rooms where presenters avoid microphones, sessions with recurring missing content audio, or recordings students rarely access.

Those findings often point to practical changes. A clearer touch panel label, better microphone storage, a revised default layout, or faculty onboarding can have more impact than replacing hardware. Technology should support the teaching model, and the teaching model will continue to evolve.

The best next step is a room-by-room assessment that asks a simple question: when a student watches this session later, will they receive the same clarity and context as someone in the room? Build every capture decision around that answer.

Commercial AV Installation Australia for Better Rooms

A boardroom can have premium displays, a high-spec conference camera, and the latest collaboration platform, yet still fail the moment a remote participant cannot hear the discussion. Commercial AV installation Australia projects succeed or fail on the planning behind the equipment, not the product list alone.

For IT leaders, facilities teams, and procurement managers, the priority is straightforward: every room must be easy to use, compatible with the organization’s standards, and dependable under pressure. That requires more than mounting a screen and connecting cables. It requires a commercial installation scope built around the room, its users, and the way work actually happens.

What Commercial AV Installation Should Deliver

Commercial AV is the combination of display, audio, video, control, cabling, networking, and collaboration technology that makes a workplace or learning environment function. Installation is the process of turning those separate components into a room people can walk into and use without calling IT.

A well-designed system should let a user start a meeting quickly, hear every participant clearly, present content at the right resolution, and join Microsoft Teams, Zoom, or another approved platform without workarounds. In customer-facing areas, it should also deliver consistent digital signage, clear messaging, and appropriate image quality throughout the day.

The definition of a successful outcome changes by space. A small huddle room may need a compact all-in-one video bar and a single display. A divisible training room may need multiple cameras, ceiling microphones, room control, presentation switching, and audio coverage that remains consistent when partitions open or close. Standardizing every room with the same hardware can reduce support overhead, but it is not always the right technical choice.

Start With the Room, Not the Shopping Cart

The most expensive mistake in AV procurement is selecting equipment before the room has been assessed. Screen size, camera framing, microphone pickup, speaker coverage, power locations, mounting surfaces, glare, acoustics, and network access all affect the final result.

A meeting room with glass walls may look impressive but create audio reflections and privacy concerns. An oversized display in a narrow room can make content uncomfortable to view. A wide boardroom table may put edge-seat participants outside a fixed camera’s useful frame. These are design issues, not faults that can always be corrected with a firmware update.

Before approving a commercial AV installation, confirm the room dimensions, seating layout, typical participant count, and expected use cases. Determine whether users need video meetings, wireless presentation, digital whiteboarding, local presentations, room booking, content sharing, or all of the above. Also establish who will use the space. Executive rooms, shared meeting rooms, classrooms, and reception zones have different expectations for control and reliability.

Build for real meeting behavior

Most organizations have a gap between the meeting experience they want and the one their rooms currently support. Employees may connect personal laptops because the room PC is slow, use a handset because the ceiling microphones are not tuned, or avoid a room entirely because joining a call takes too long.

Those patterns are valuable evidence. A practical design addresses them directly. For example, a BYOD-heavy workplace may need reliable USB-C or HDMI content sharing alongside a dedicated room system. A centrally managed Teams Rooms or Zoom Rooms estate may benefit more from consistent appliance-based rooms and a simple touch controller. The right answer depends on governance, user behavior, security requirements, and support capacity.

Specify the AV System as One Connected Solution

Commercial AV components are often bought in separate purchase orders: displays from one supplier, cameras from another, cabling from a contractor, and meeting room devices from an IT reseller. That approach can work for a simple room, but it creates risk as complexity increases.

Compatibility must be verified across the complete signal path. A 4K display does not guarantee 4K content sharing. A camera may support advanced framing features that are unavailable on the selected room platform. A USB extension may work at a desk but become unreliable over the cable distance required in a boardroom. Audio devices need to be selected and positioned as a system, not treated as independent accessories.

Commercial-grade equipment also matters. Consumer products can appear cost-effective at the point of purchase, but they may lack centralized management, suitable warranty coverage, secure deployment controls, mounting options, or the duty cycle expected in heavily used rooms. The lower upfront price can become expensive when devices are difficult to manage or replace across multiple sites.

At e365 SuperStore, businesses can source collaboration hardware, commercial displays, audio systems, and supporting accessories through one specialist channel, while also accessing installation and integration support. That reduces the handoff points that commonly delay projects and complicate fault resolution.

Commercial AV Installation Australia: Scope the Work Clearly

A quote should identify more than the hardware model numbers. It should describe what is being installed, how it will be connected, what assumptions apply, and what the completed room will do. If the scope is vague, budget surprises tend to appear once installers arrive on site.

Ask whether the proposal includes a site survey, equipment mounting, structured cabling, cable containment, power work, network configuration, programming, audio tuning, platform sign-in, testing, user orientation, documentation, and removal of packaging. Some items may require coordination with builders, electricians, network teams, or security contractors. Clear ownership prevents a display from being mounted while the required data connection is still weeks away.

Multi-site projects need additional discipline. A repeatable room standard can improve purchasing leverage and simplify support, but each location should still be checked for local constraints. Ceiling construction, wall reinforcement, network policy, freight access, and after-hours installation rules vary considerably between sites.

Plan the network and security early

AV systems are now network-connected workplace devices. Room computers, video bars, touch controllers, wireless presentation tools, digital signage players, and management platforms all need approved connectivity. Network requirements should be confirmed before deployment, including VLANs, device authentication, proxy settings, firewall rules, Wi-Fi coverage where relevant, and remote management access.

This is especially important for organizations standardizing on Microsoft Teams Rooms or Zoom Rooms. A room that powers on but cannot sign in, receive updates, or communicate with the management portal is not ready for handover. IT and AV stakeholders should validate the configuration together rather than leaving network testing until the final hour.

Installation Quality Shows Up in the Details

Professional AV installation is visible in the user experience, but much of the work is behind the wall, above the ceiling, or inside the rack. Correct mounting height, camera placement, cable labeling, ventilation, strain relief, power protection, and clean cable paths all contribute to a system that is easier to service and safer to operate.

Audio is where installation quality becomes most obvious. Microphone placement must suit room geometry and expected speaking positions. Speaker locations need to support intelligibility without creating hot spots or feedback. After physical installation, audio tuning and call testing are essential. A system can pass a basic power-on check and still perform poorly in a real hybrid meeting.

Acceptance testing should reflect ordinary usage. Test a remote call, content sharing, camera framing, microphone pickup from multiple seats, control functions, and recovery after a restart. Where rooms are standardized, document the final configuration so support teams can troubleshoot confidently and reproduce the design at the next location.

Budget for the Full Lifecycle, Not Just Day One

Hardware price matters, particularly across a rollout of dozens of rooms, but the lowest equipment cost is not automatically the lowest project cost. Rework, user frustration, unplanned truck rolls, incompatible accessories, and inconsistent room standards can quickly outweigh an initial saving.

A realistic budget includes equipment, installation labor, cabling, electrical and builder coordination where needed, configuration, commissioning, training, warranty considerations, and ongoing support. It should also account for growth. If a small training room may become a hybrid classroom next year, allowing for additional inputs, microphone channels, or control capability during the initial build can be more economical than reopening ceilings later.

There are trade-offs. A highly customized room can deliver an exceptional experience but may need more specialist support. A standardized appliance room is faster to deploy and manage, but may offer less flexibility for complex workflows. The best option is the one that matches the room’s business value and the organization’s ability to maintain it.

Make Handover Useful for the People Who Run the Room

Installation is not the finish line. A completed system needs a handover that gives IT, facilities, and end users confidence. That should include clear operating guidance, configuration records, warranty details, and an escalation path if an issue appears after go-live.

Short, role-specific training is often more effective than a long technical demonstration. End users need to know how to start, join, share, and end a meeting. Support staff need to know the room standard, basic recovery steps, and when to escalate. Executive assistants and facilities coordinators may need a different level of guidance again.

When you are planning your next room refresh or site rollout, begin with the user experience you expect on the first busy Monday morning. Then make every technology, installation, and support decision serve that outcome.

Digital Signage Australia Buyers Can Rely On

A blank screen at reception, an unreadable menu board, or a display that cannot be updated before a major promotion creates an immediate operational problem. Digital signage Australia buyers need is not simply a large TV on a wall. It is a managed communication tool that must stay visible, current, secure, and reliable through long operating hours.

For IT managers, facilities teams, schools, retailers, and multi-site organizations, the purchasing decision affects far more than picture quality. The right solution reduces printing costs, speeds up internal communication, supports brand consistency, and gives teams control over what customers, staff, students, or visitors see at every location.

Why commercial digital signage matters

Consumer televisions can appear attractive on a quote because their upfront price is lower. For a meeting room used occasionally, that may be a reasonable trade-off. For public-facing signage, it usually is not.

Commercial displays are designed for longer duty cycles, centralized management, portrait operation, and the physical realities of business use. A display running 16 hours per day in a lobby has very different demands from a television used for a few hours each night at home. Heat management, panel durability, warranty terms, remote control, and replacement availability all matter once a screen becomes part of daily operations.

Brightness is another common point of failure. A standard indoor display may look excellent in a controlled boardroom, then look washed out beside a glass storefront or under direct ambient light. Commercial signage is specified in nits, which measure brightness. As a practical starting point, 350 to 500 nits suits many indoor locations, while window-facing or high-ambient-light spaces often require 700 nits or more. Semi-outdoor and outdoor applications require specialist high-brightness hardware, protective enclosures, and careful planning around heat, glare, and power.

The lowest display price is rarely the lowest cost of ownership. A screen that fails early, requires manual content changes, or cannot be matched when a site expands can quickly erase any initial saving.

Specify the screen before choosing the software

A content management system is essential, but the display environment should drive the hardware specification first. Start with where the screen will sit, who needs to see it, how long it will operate, and how content will be updated.

Match size and orientation to the viewing distance

Bigger is not automatically better. A large 86-inch display can dominate a small reception area, while a 43-inch screen will struggle to deliver readable messages across a busy retail floor. Consider the distance of the average viewer and the amount of content shown at one time. If people need to read detailed schedules, pricing, or wayfinding information, prioritize clear layouts and suitable viewing distance over cramming more content onto the screen.

Portrait displays are effective for directories, promotions, and social-style content. Landscape displays suit video, dashboards, menu boards, and corporate messaging. Commercial panels should support the intended orientation without compromising cooling or warranty coverage. This is a detail often missed when a standard television is mounted vertically.

Select the duty cycle for the real operating schedule

Commercial signage is commonly rated for 16/7 or 24/7 operation. A 16/7 display can suit offices, education sites, and retail locations with defined trading hours. A 24/7 model is the better choice for airports, healthcare environments, transport hubs, security operations, and locations where screens remain active overnight.

Do not over-specify every screen if the environment does not justify it. At the same time, do not put a lower-duty panel in a critical location simply to reduce the initial quote. The right specification depends on the application, not a one-size-fits-all rule.

Choose a content platform that fits your team

Digital signage must be easy enough for approved staff to update without involving IT for every announcement. Most organizations need a cloud-based content management platform that supports templates, scheduling, user permissions, playlists, proof-of-play reporting, and remote monitoring.

Some commercial displays include a built-in system-on-chip player. This can reduce hardware count and simplify installation for straightforward campaigns. An external media player may be the stronger option when you need advanced analytics, interactive content, specialized integrations, or a standardized player across mixed display brands.

Ask early whether the platform can support your content sources. A retail team may need promotional images and video. A corporate communications team may need Microsoft 365 calendars, Power BI dashboards, emergency notices, or internal news feeds. A school may need timetable, event, and alert content. The best platform is the one your team will actually keep current.

Build a digital signage Australia deployment around the site

A screen, mount, media player, and license are only part of the solution. Installation quality determines whether the system is safe, serviceable, and dependable after handover.

Before ordering, assess wall construction, mounting height, cable paths, network availability, power access, ventilation, and physical security. A display mounted flush into joinery may look clean, but it still needs airflow and service access. In high-traffic public areas, use commercial-grade mounts, tamper-resistant hardware where appropriate, and secure cable management.

Network planning should not be an afterthought. Signage players need reliable connectivity for scheduling, software updates, and monitoring. Wired Ethernet is often preferred for fixed commercial installations, particularly where Wi-Fi congestion or interference could affect reliability. If the signage platform is cloud-managed, your IT team should review firewall requirements, device authentication, permissions, and update policies before deployment.

For multi-site rollouts, standardization is a major advantage. Using a defined set of display sizes, mounts, media players, and templates makes procurement easier and support faster. It also gives the communications team a consistent canvas across locations, even where individual sites have different layouts.

Know where LED, video walls, and touchscreens fit

A commercial LCD display is the practical choice for many reception areas, meeting spaces, retail promotions, school communications, and menu boards. It offers strong image quality, straightforward installation, and a broad range of sizes.

LED video walls are worth considering where visual impact, very large formats, or close-to-edge-to-edge presentation is the priority. They are common in flagship retail, control rooms, auditoriums, large lobbies, and event environments. They also bring different requirements around pixel pitch, structural support, calibration, controller hardware, and installation expertise. An LED wall is not automatically better than a large commercial display. At closer viewing distances, the wrong pixel pitch can make the image appear coarse.

Interactive touchscreens are another separate category. They can support visitor check-in, product exploration, room booking, and wayfinding, but only when the content is designed for touch. Adding a touchscreen where users only need to view information can add cost and complexity without improving the experience.

Budget for the complete solution, not just the panel

A useful commercial quote should make the full project visible. Beyond the screen itself, account for mounts or floor stands, media players, software licensing, cables, network work, electrical work, installation, configuration, content design, and ongoing support.

There are four questions procurement teams should settle before comparing suppliers:

  • Is the display rated for the required daily operating hours and lighting conditions?
  • Is the signage software priced per screen, per player, per month, or as part of a longer license term?
  • Who will install, configure, test, and support the system after deployment?
  • Can the chosen hardware be supplied consistently as additional sites or screens are added?

This approach makes comparisons fair. A low hardware price can conceal a costly software model, limited warranty support, or an installation scope that excludes the work required to get the system live.

Buy for consistency, support, and expansion

Organizations rarely stop at one screen. A successful pilot in reception often becomes a rollout to break rooms, meeting zones, retail locations, classrooms, and customer service areas. Choose products that can scale without forcing a complete redesign six months later.

e365 SuperStore helps commercial buyers source digital signage hardware, professional displays, mounting solutions, media players, and supporting workplace technology with Australia-wide delivery, competitive commercial pricing, and technical guidance. For complex sites, professional installation and integration support can remove the risk of mismatched components and delayed handover.

The most effective signage project begins with a simple question: what must this screen help people do or understand? Specify the answer first, then select the display, platform, and deployment model that will keep delivering that message every day.

Digital Signage Displays That Work Harder

A lobby screen that shows yesterday’s promotion, a menu board that is unreadable in sunlight, or a meeting-room display that needs restarting every morning all create the same problem: technology that looks inexpensive at purchase becomes costly in operation. Digital signage displays need to earn their place through visibility, uptime, simple management, and a fit with the environment where people will actually see them.

For IT teams, facilities managers, and procurement leaders, the goal is not simply to buy a larger screen. It is to create a reliable communications channel for employees, visitors, customers, students, or patients – one that can be managed consistently across one location or hundreds.

What separates commercial digital signage displays from TVs?

A consumer television can be tempting for a small, low-use application. It is often readily available and carries an attractive upfront price. But a commercial display is designed for a different workload and purchasing standard.

Commercial digital signage displays are built for long operating hours, typically 16/7 or 24/7 depending on the model. They use panels engineered for sustained brightness, include commercial-grade connectivity and controls, and are supported by warranties intended for business use. Many also include scheduling, remote monitoring, orientation support, and integrated media-player options that reduce the number of devices behind the screen.

That distinction matters most in public-facing and mission-critical locations. A screen in a reception area, retail window, transportation hub, school corridor, or production floor cannot be treated as a disposable TV. If it fails during business hours, the message disappears and the replacement process consumes staff time.

Commercial models also give organizations a stronger path to standardization. When every site uses compatible display families, mounting patterns, remote-control settings, content players, and warranty processes become easier to manage. The initial savings from buying mismatched screens can quickly disappear when every location needs a different fix.

Start with the viewing environment

Screen size should follow viewing distance, available wall space, and the amount of information on screen. A 55-inch display may be ideal for a reception message board viewed from several feet away, while a 75-inch or 86-inch display can make more sense in a large lobby, cafeteria, lecture room, or open office. Bigger is not automatically better if viewers are standing close to the screen or the content consists of small, dense text.

Brightness is equally critical. Indoor displays commonly suit offices, classrooms, meeting spaces, and controlled retail environments. However, screens near storefront windows, glass atriums, bright entrances, or strong overhead lighting may need a high-brightness panel. A standard indoor display in direct sunlight can look washed out, regardless of how good the creative appears on a designer’s monitor.

Consider these environmental questions before selecting a model:

  • Will the display run for a few hours each day, 16 hours, or continuously?
  • Is the screen installed in landscape or portrait orientation?
  • Will it face natural light, glare, dust, heat, or public contact?
  • Does the installation need a wall mount, ceiling mount, kiosk enclosure, or video wall structure?
  • Can staff safely access the display for service without disrupting the space?

These details determine the right panel class and installation method. They also prevent costly redesigns after a screen has already been mounted.

Orientation changes the content plan

Portrait displays are effective for wayfinding, promotions, elevator banks, menu boards, and social-style content. Landscape screens suit corporate announcements, dashboards, video, presentation material, and broad menu layouts. The choice should be made with the content owner, not only the installer.

A portrait screen running landscape slides with large empty areas is a missed opportunity. Conversely, forcing detailed dashboard content into portrait orientation can make the information difficult to read. Choose the orientation that serves the message, then confirm that the display is rated to operate that way.

Choose the right display type for the job

Most business signage projects fall into a few practical categories. Standard commercial displays work well for internal communications, meeting-room signage, reception areas, classroom notices, and retail promotions. High-brightness displays are better suited to window-facing applications and brightly lit public spaces.

Interactive touch displays are useful when the viewer must search, select, check in, browse products, or access building information. They can support self-service in retail, visitor management, education, and corporate environments, but they require a thoughtful user interface and a plan for cleaning and support.

Video walls create impact in executive briefing centers, control rooms, flagship retail spaces, and large public venues. Their trade-off is greater design complexity. Display bezel width, mounting precision, content resolution, service access, heat management, and controller selection all need to be addressed before procurement.

For specialized use cases, outdoor-rated displays, all-in-one LED walls, stretch displays, and kiosk solutions may be more appropriate than a conventional panel. The best option depends on audience behavior and installation conditions, not simply on what looks most impressive in a product catalog.

Content management is the operating system of signage

A display without a practical content workflow becomes a static digital poster. The display hardware, media player, and content management system should be treated as one solution.

For a single site, an integrated system with straightforward scheduling may be sufficient. For multi-site organizations, a centralized platform can allow authorized users to publish by location, screen group, time of day, or campaign. This is especially valuable for retail chains, school districts, healthcare networks, distributed offices, and franchise operations that need local relevance without giving up brand control.

The right platform should support the content formats your team uses, including images, video, web pages, dashboards, and data-driven feeds where appropriate. It should also make it easy to set display schedules, assign user permissions, and verify whether a screen is online. Remote device monitoring can save substantial time when signage is deployed across multiple facilities.

Keep the content disciplined. Short messages, clear type, strong contrast, and a visible call to action perform better than overcrowded slides. If someone has only five seconds to absorb the screen, they should understand the main point without reading a paragraph.

Do not ignore network and security requirements

Signage is connected technology. Before rollout, confirm whether displays or players will use wired Ethernet, Wi-Fi, or a dedicated network segment. Assess bandwidth for video content, firewall requirements, device credentials, remote-management policies, and software-update processes.

IT teams should also decide who owns each task. Facilities may manage physical access, marketing may create campaigns, internal communications may approve messages, and IT may control the network and device platform. Clear ownership avoids the familiar result of a screen that is installed but never updated.

Build a deployment plan that supports growth

The most successful projects begin with a pilot. Test one or two displays in representative environments, validate brightness and viewing angles, measure network performance, confirm content workflows, and gather feedback from local users. A pilot often reveals practical issues that are not obvious on a floor plan, such as glare at a certain hour or insufficient clearance for a service technician.

From there, standardize the bill of materials. Use approved display sizes, mounts, players, cables, and configuration settings wherever possible. Standardization improves buying power, speeds up installations, and reduces the spare inventory required to keep screens operational.

Installation quality matters as much as panel selection. Proper mounts, cable management, power access, ventilation, and secure device placement affect reliability and the finished appearance. In public areas, consider tamper resistance and safety. In offices and classrooms, ensure the screen does not obstruct sightlines, access paths, or fire-safety equipment.

A specialist supplier can add value here by aligning display selection, mounting hardware, playback devices, installation, and ongoing technical support under one commercial plan. e365 SuperStore supports buyers who need more than a box delivered to a loading dock – especially when projects involve multiple rooms, sites, or technology standards.

Calculate value beyond the screen price

A lower-priced display is not always the lower-cost option. Evaluate total cost over the expected service life, including installation, player hardware, content software, licensing, network changes, energy use, support, and replacement coverage. A commercial screen with a longer operating rating and appropriate business warranty may protect the budget more effectively than a consumer alternative replaced after early failure.

Also consider the cost of missed communication. In retail, an offline promotion can affect sales. In a workplace, outdated safety information or event messaging can reduce trust. In education, poorly located screens can leave students without timely updates. Reliability has a direct operational value.

The strongest digital signage program is one that people notice without needing to think about the technology behind it. Specify for the environment, standardize what you can, and give content owners a system they can use confidently. Then your displays can keep doing their job: delivering the right message, in the right place, at the right time.

Digital Signage Display for Retail That Sells

A retailer can spend thousands on foot traffic and still lose the sale at the shelf. That is where a digital signage display for retail earns its keep. When the right screen is in the right place with the right content, it does more than look modern – it moves attention, supports staff, and helps shoppers make faster decisions.

Retail buyers already know the pressure points. Promotions change quickly. Product availability shifts. Store teams are stretched. Printed signage is slow to update and often inconsistent across locations. Digital signage gives you control, speed, and a cleaner brand presentation, but only if you buy for the environment, not just the spec sheet.

What a digital signage display for retail actually needs to do

A retail display is not just a TV mounted on a wall. In commercial environments, screens run longer hours, handle brighter spaces, and need better reliability. A consumer panel might look fine on day one, but if it is running all day near a storefront window, the cracks show quickly – uneven brightness, poor thermal performance, limited scheduling, and short lifecycle support.

A proper digital signage display for retail should be selected around three things: visibility, manageability, and durability. Visibility means customers can actually read the message under store lighting and from the expected viewing distance. Manageability means your team can update content without sending someone to every site with a USB stick. Durability means the panel is built for extended daily operation and backed by commercial support.

That sounds straightforward, but trade-offs start immediately. Higher brightness improves readability but raises cost. Larger screens create impact but need the right mounting, power, and viewing angle. An advanced content platform adds control, yet it also introduces subscription cost and deployment complexity. The best choice is rarely the biggest or the cheapest. It is the one that aligns with your store format and operational model.

Start with the retail environment, not the screen

Too many signage projects begin with display size. The smarter approach is to map the use case first. A window-facing promotion screen has different requirements than an endcap display, a menu board, or a queue management screen at checkout.

If the display sits near direct sunlight, brightness matters more than resolution. If it is mounted high above shoppers, wide viewing angles and legible typography matter more than ultra-fine detail. If the screen supports weekly campaigns across multiple branches, remote management matters more than onboard media playback.

Store layout should also influence your buying decision. A narrow aisle may benefit from a stretched display or portrait orientation. A flagship store may justify videowalls or large-format impact screens. A chain with dozens of locations may prioritize easy standardization so procurement, support, and replacement are simpler over time.

This is where commercial buyers usually separate a one-off purchase from a scalable rollout. If your estate is growing, standardizing the same mounting pattern, media player approach, CMS, and display family can save far more over three years than shaving a small amount off unit cost upfront.

The specs that matter most

Brightness is one of the first numbers worth paying attention to. In bright retail environments, especially front-of-store or window-facing applications, low-brightness screens can wash out fast. For internal signage in controlled lighting, moderate brightness may be enough. For high-ambient-light areas, you need a display built to stay visible without forcing customers to squint.

Operating hours matter just as much. Some retail sites need screens running 16 hours a day. Others may need near-continuous operation. Commercial displays are designed around these use cases, and the rating matters because it affects heat handling, warranty expectations, and long-term reliability.

Resolution is important, but it is often overvalued. On a modest screen viewed from several feet away, Full HD may be perfectly adequate. On larger formats, close viewing distances, or multi-panel layouts, 4K becomes more relevant. The right answer depends on content design and distance, not marketing language.

Connectivity should be reviewed with your deployment plan in mind. Integrated system-on-chip platforms can simplify rollout for basic signage. External media players offer more flexibility, more processing headroom, and easier replacement if the CMS strategy changes later. There is no universal winner here. Simplicity favors integrated. Scalability and customization often favor external players.

Content is what makes the hardware pay off

The display gets attention, but the content closes the gap between interest and action. Many retail signage projects underperform because the hardware is fine and the messaging is not. Screens packed with small text, generic lifestyle footage, or stale promotions become background noise quickly.

Good retail signage content is short, clear, and timed to the buying moment. Near the entrance, it should create interest and direct people deeper into the store. At the shelf, it should reinforce product value, pricing, or differentiation. At checkout, it can support impulse add-ons, loyalty messaging, or service offers.

There is also a strong case for operational content. A digital sign can reduce repetitive staff questions by highlighting store services, pickup instructions, promotions, opening hours, or product categories. In larger environments, wayfinding and queue communication can improve customer flow as much as sales messaging improves conversion.

If you manage multiple locations, the content management system becomes a business tool, not just a marketing add-on. You want scheduling, user permissions, proof of playback, and location-based targeting. A chain that can push campaigns by region, daypart, or inventory status has a real advantage over static signage.

Where retail buyers often overspend or underspec

The most common mistake is buying a low-cost screen that is not meant for commercial duty. It saves money at purchase, then creates support issues, replacement costs, and inconsistent presentation later. The other common mistake is overbuilding the solution for a simple use case. Not every store needs an enterprise-grade networked signage ecosystem with custom integrations.

The right balance comes from understanding total cost of ownership. That includes the display, mount, media player if needed, CMS licensing, installation, power, support, and replacement planning. It also includes the labor saved by updating promotions remotely instead of printing and dispatching new materials.

Installation quality is another area where shortcuts become expensive. Poor mount selection, weak cable management, bad viewing angles, and inaccessible power points all reduce the value of the screen. For multi-site retail, consistency matters. A signage project should be easy for store teams to live with, not just easy to approve on paper.

Choosing the right partner matters

Retail signage is one of those categories where buyers benefit from working with a specialist rather than treating it like a commodity display purchase. Product breadth matters because different store environments call for different display classes, brightness levels, and form factors. Technical guidance matters because compatibility between screens, players, mounts, and CMS platforms affects the rollout more than most procurement teams expect.

For business buyers, the right supplier should help narrow the field quickly. They should be able to advise on commercial display ranges, recommend the right size and orientation, explain whether an integrated player is sufficient, and clarify what installation support is required. They should also understand how signage fits into the broader AV and workplace technology stack, especially if your retail business is standardizing screens across customer-facing and back-of-house use cases.

That is where a specialist commercial retailer such as e365 SuperStore has an advantage. The value is not just product access. It is the ability to source recognized brands, support quote-driven procurement, assist with deployment planning, and keep the project commercially efficient from selection through rollout.

How to decide with confidence

If you are evaluating a digital signage display for retail, start by answering a few operational questions. Where will the screen be installed, and what lighting conditions will it face? How many hours a day will it run? Will content be updated locally or remotely? Is this a one-store installation or part of a broader rollout? What business outcome matters most – promotion visibility, wayfinding, menu presentation, queue management, or brand impact?

Once those answers are clear, the shortlist becomes easier. You can match brightness to environment, size to distance, platform to content workflow, and budget to expected lifecycle. That approach avoids the two outcomes retail teams want to avoid most: buying a screen that looks cheap in six months, or paying for enterprise features that never get used.

Retail signage works best when it is treated as part of the sales floor, not an afterthought mounted above it. The screen should earn its place every day by informing faster, selling better, and making store operations easier for the people who run them.

NEW Dten available in 55-inch and 75-inch models

DTEN D7X 55-inch and 75-inch models

The all-in-one DTEN D7X transforms every meeting room into a modern workspace. Its powerful deep learning capabilities and AI features enable it to ensure great video collaboration experiences for your team, even without any user intervention. The D7X is also unique because of its enhanced compute capabilities, which enable it to perform multiple tasks at the same time and make sure that they are all run smoothly and efficiently.

With DTEN D7X, you can quickly connect any laptop to a single USB-C cable and start your video meeting. DTEN D7X features upgraded speakers, camera and microphones to create an enterprise ready professional meeting experience. It comes with Zoom and Microsoft Teams (via a free software download) so that you can join Zoom or Microsoft Teams calls on demand.

Listen up. Hear everything crystal clear with the new DTEN D7X 75″, a flexible, interactive display that’s as versatile as it is powerful. With state-of-the-art AI technology, it works with your team to optimize sound so each person can be heard, even in larger rooms like boardrooms. The upgraded speaker system features four times more sound and four new microphones ensure your quieter voices are picked up loud and clear.

The Future of Work

The Future of Work

The Future of Work | Have you got the best videoconferencing solution?
The world has changed. We’ve never used so much video, at home and at work. But in the rush to get teams working remotely, have you ended up with the best solution?

As hybrid work transforms into anywhere work, collaboration and employee experience goals continue to evolve. Work and learning spaces are changing to meet team expectations, and your technology must keep pace, with equal attention given to remote and on-site experiences. In short, we need to make anywhere work more
human-centric.

We have insights into strengthening the human experience in the workplace, including:

  • Our human-centric workplace how-to guide
  • Immersive spaces, platform interoperability, and VR design
  • In-person collaboration and events case study
  • Hybrid learning environments
  • Experience technology that moves the world
  • Technology partner solutions

Latest April Product Releases (Videoconferencing Equipment)

Latest April Product Releases (Videoconferencing Equipment)

Picture of e365 Superstore

e365 Superstore

Latest Product Announcements

The videoconferencing industry has grown exponentially and with numerous tools coming out every month, this will only continue to improve. We have compiled a list of the most useful videoconferencing equipment out there this month. 

Overview

Logitech Rally Bar + TAP IP- Medium- Graphite

Logitech Rally Bar + TAP IP- Medium- Graphite e365 SuperStore are a premier authorised Logitech gold partner with Australian stock and warranty Logitech Rally bar are a Powerful All-in-one Video Conferencing Bar with Brilliant Optics and Automated PTZ. All-in-one Video Bar for Midsize Rooms. Simple to Set and Easy to Use. Only Quality Products. Trusted Australian Vendor. Friendly Customer Service. No Credit Card surcharge. Logitech Tap and Tap IP Compatibility Information  

MaxHub Bluetooth Speakerphone UC BM35

MaxHub Bluetooth Speakerphone BM35 Unlock a new level of meeting clarity with the next-generation BM35 speakerphone. Crystal clear audio combines with a powerful pick-range to transform any small to mid-sized meeting space. Break free from the restrictions of wired devices with an agile, flexible solution that adapts as quickly as your team. 

In the home, the business office, or anywhere else, the BM35 is the ultimate part for clear conversations. Comes with 3 year warranty. Amplify Conference Quality with Superior Sound Portability and practicality come together in a powerful audio device, built for better meetings. The BM35 is optimized to keep human voices clear. Capturing every utterance in perfect detail, the BM35 empowers any team.

AVER CAM570 4K DUAL LENS PTZ AUDIO TRACKING CAMERA Stress FREE Installation

AVER CAM570 4K DUAL LENS PTZ AUDIO TRACKING CAMERA AVer CAM570 is a 4K dual lens camera with a 36X Total zoom PTZ camera and a second AI lens with 95˚FOV. Equipped with a built in microphone, CAM570 detects human voices up to 10M and offers audio tracking function. AI technology such as Smart Gallery and gesture control can capture every attendee up-close with premium video quality. 

Built-in Microphone Enables Audio Tracking Easily focus on active speaker with audio tracking mode and presentation mode. The camera will follow the speaker automatically or you can set up a preset point to focus on a specific area. The built in microphone picks up human voices up to 10M without being disturbed by a local speaker.

POLY Studio X50 & Poly TC8 4K Video Conf System W 3yr Poly Plus 24x7 Support

Poly studio X50

Poly Studio X50 with touch panel TC8 connects to Microsoft Teams and Zoom The Poly Studio X50 video bar delivers radical simplicity in a small, elegant package. In small- and medium-sized rooms, connect easily with whatever video collaboration software you may use. Experience full boardroom-quality audio, advanced camera capabilities, and quick wireless content—all in one sleek video bar. 

And say goodbye to unnecessary pucks, cords, and cables, along with the PC or Mac to drive the meeting, since the Poly Video OS runs the show. Easy to install, easy to manage. • Ideal for rooms of up to 8 participants • Surround everyone with the rich, legendary sound with stereo speakers that deliver immersive, room-filling audio • Dual monitor support ensures you have the ideal setup for room of many sizes • Be heard clearly with next generation microphone array

DTEN ME 27 All in One Zoom device

DTEN ME 27 All-in-One Personal Collaboration device for Zoom DTEN ME – the ideal solution for working from home Combining the technology in the DTEN ME with loom’s enterprise-quality software delivers the ideal solution for the home office. Simply login with your Zoom user account and create an instant office experience without any additional licenses. 

This solution integrates Zoom Meetings, phone calling, whiteboarding and annotation in a 27 multi-touch display built for the desktop. It is designed to keep your work­space clutter free and organized to deliver a professional meeting experience.

CommBox - Elegance XL Cart

CommBox – Elegance XL Cart Understatedly stylish fixed-height mobile stand with a pen shelf and designer hubless lockable castors. The cart suits CommBox screens up to 110″. Other features include 3″ heavy-duty locking castors and a handy pen and equipment shelf.

Maxhub v6 Collaboration Display - Maxhub C7530

Maxhub C5530

Maxhub v6 Collaboration Display – Maxhub C7530 Maxhub C7530 v6 Classic Series Maxhub C7530 The Maxhub C7530 – Integrating professional video conferencing, seamless screen-sharing, advanced whiteboard technology, and a brilliant audiovisual experience, is the ultimate corporate-collaboration assistant. 

Drive productive teamwork and increase organizational efficiency with this meeting-room must-have. Installation and Integration Australia Wide Total Solution, Minimal Setup – Maxhub C7530 A complete, seamless design fulfills every meeting requirement, including built-in camera, mic, and touch panel. Whether video conferencing or hosting a local discussion, it’s as easy as plugging in your power cable.

Cisco Webex 8875 IP Phone - Corded - Corded - Wi-Fi, Bluetooth - Desktop - Carbon Black - VoIP - IEEE 802.11a/b/g/n/ac - 2 x Network (RJ-45) - PoE Port

Cisco Webex 8875 IP Phone – Corded – Corded – Wi-Fi, Bluetooth – Desktop – Carbon Black – VoIP – IEEE 802.11a/b/g/n/ac – 2 x Network (RJ-45) – PoE Port CP-8875-K9= Webex 8875 IP Phone – Corded – Corded – Wi-Fi, Bluetooth – Desktop – Carbon Black Webex 8875 IP Phone – Corded – Corded – Wi-Fi, Bluetooth – Desktop – Carbon Black – VoIP – IEEE 802.11a/b/g/n/ac – 2 x Network (RJ-45) – PoE Ports Enjoy superior voice communications while retaining the convenience and user-friendliness over Internet Uses VoIP technology to transfer audio signals over the Internet while circumventing high toll charges by telephone companies

Yealink MeetingBoard 86 inch for MS Teams

Yealink MeetingBoard 86 inch Collaboration Display For Microsoft Teams e365 SuperStore are a premier authorised Yealink Platinum partner with Australian stock and warranty Simple to Set and Easy to Use. Only Quality Products. Trusted Australian Vendor, Many Payment options, Same Day Delivery, Friendly Customer Service. 

No Credit Card surcharge. (stand available separately) Unlock Creative Teamwork The Yealink Meeting Board collaboration display effectively facilitates powerful digital collaboration by combining everything in the room, from the computing unit to a wide 86-inch touchscreen display, 4K camera, microphones arrays, speakers, and built-in Microsoft Teams. The Android 10 OS and an Octa-core high-performance chipset offer maximum performance.

Facebook
Twitter
LinkedIn
Picture of e365 Superstore

e365 Superstore

e365 Superstore are experts in video conferencing equipment. We have completed thousands of projects over the last 25 years and we are passionate about virtual communications. Click here to find out more about our company.

Ultimate guide to Zoom-Microsoft Teams room solution.

Face-to-face interaction is critical in business communications but teams are becoming increasingly dispersed. The Video Conferencing systems on the market now are designed with smaller huddle rooms in mind

Our Team are

  • Highly experienced Unified Communications, Videoconferencing, Collaboration Solutions Specialized
  • Offer a consultative approach
  • Highest product and application knowledge
  • Totally technically proficient
  • Superior level of networking competency, service, support & customer satisfaction

Our Video/Audio/IP telephony/Unified Communications solutions include:

  • Cisco, Logitech, Crestron, Poly, Yealink  Video Conferencing endpoints for Meeting Rooms, Cloud, On-premise and Hybrid Solutions, Microsoft Teams, Zoom, Google meet.
  • Integrate your Boardroom solutions
  • Professional services, Managed Services.
  • Audio Visual solutions (Touch boards, Projectors, Trolleys etc.)

Please let me know if you would like one of our team to discuss with you and  provide the latest Communication solutions you and your organisation.

e365 Distribution October BIG Discounts

e365 Distribution has the latest BYOD Collaboration solutions for your Home Office, Huddle room and meeting rooms

Special pricing  is limited till 31st October

  1. Logitech Tap,Rally
  2. Poly Studio X30-X50
  3. Yealink MVC 800
  4. Cisco Room Kit Mini
  5. Crestron MX150 
  6. Headsets
  7. Smartboards from Hitachi, Maxhub ,Samsung, Commbox, Avocor,NEC,LG,Viewsonic & more
  8. Trolley’s, Home office furniture 
  9. Dten Smartboard & Videoconferencing.


e365 provide a Installation, Support and help desk.

 e365 has the most brands in Australia and most are in stock ready for delivery Australia-Wide

Black Friday sale

Black Friday discounts have started early at e365 Distribution online Collaboration web site www.e365.com.au  

 If you are looking for some big discounts for

  • LED’s screens
  • Smartboards
  • Videoconferencing solutions (Cisco, Poly, Crestron, Zoom, MS Teams )
  • Headsets
  • VoIP phones
  • Cloud Video/Voice services
  • Conference phones
  • Projectors
  • LED trolleys etc.

e365 has the most brands in Australia and most are in stock ready for delivery Australia-Wide

(Black Friday-Special pricing ends close of business 29/11/2019)

eVideo connects Koppen Developments

eVideo connects the latest Cisco Room kit systems for Koppen Constructions. Their staff can now have visual and audio collaboration between North Queensland and Central Queensland offices as well customers.

Sign Up For Our Newsletter to Receive Regular Specials!